NOTE: If you want the “short story” about How To Store and Prepare Fresh Clams, please scroll down to Preparation – Part B at the end of the page. And, if you’re interested, I’ve included links to lots of great seafood recipes and resources down there as well!

My husband and I had a pretty adventure-filled summer in 2014. We travelled a lot and we ate a lot of absolutely amazing seafood – literally from sea to shining sea.
During a particularly incredible trip to the Outer Banks for a special family reunion, I had the opportunity to cook clams for the first time. We all stayed in an amazing beach house, and I wanted nothing more than to prepare something fabulously fresh and “coastal” for everyone. Oh, and the meal I would be preparing was for several members of my husband’s extended family – whom I had only just met for the first time the day before. {No pressure!}
I’ll tell you the whole story about the incredible clam recipe I found and the trip itself very soon, but for now, let’s just say it all went well. My husband’s family was wonderful and gracious, and they complimented the dish left and right. I will love them forever for many reasons, but their graciousness totally won my heart.
I owe much of the success of my first-ever clam feast to my husband’s Uncle Tom. An avid fisherman who has spent his whole life on the East Coast, he knows a thing or two about preparing seafood. He effortlessly whipped up scratch-made sauces and showed me the right way to open clams – with his own well-seasoned clam knife, of course. Apparently, when you’re as passionate and knowledgeable about seafood as he is, you travel with your own tools. {I totally get that now.}
He explained – much to my surprise – that you don’t usually have to do very much with hard shell clams that have been purchased from a fish market. He scrubbed the shells a little, put them in a dry bowl, and set the bowl in the refrigerator while I prepared the rest of the ingredients. I couldn’t believe that was all there was to it!
I wanted to make that same clam dish again several months later, and decided to do a little more research first. Not because I doubted Uncle Tom’s sage advice, but as someone who grew up in the Midwest eating mostly wild-caught freshwater fish, I just wanted to know more about clams in general.
I was quickly reminded why I thought clams were too difficult to cook at home. There’s so much information out there… So many different opinions and old wives tales that make seafood preparation seem far more difficult than it needs to be.
My husband and I are now madly in love with a number of clam dishes that we’ve prepared at home. We have many more recipes yet to try, and believe very strongly that we owe it to ourselves – and our food – to do things right. So while I continue to learn as much as I can about seafood, I’ll be updating this outline with new information as I find it. But for now, here is the best basic (not exhaustive) information that I’ve found to date.

Varieties of Fresh Clams
First of all, I’m talking about hard shell clams here such as Littlenecks, Cherrystones and Manilas. Here in Minnesota, these are the kind we see most often at local markets. The darker, rounder hard shell clams can generally be eaten raw, and they’re absolutely delicious when cooked in sauces, served with pasta and vegetables, or just about any other preparation you can think of.
Soft shell clams have lighter, oblong-shaped shells that are relatively brittle. The shells never close completely because these clams have protruding “necks” that are used for siphoning water and feeding. They tend to be filled with sand and grit, so these are the ones that need to be purged before you eat them. They’re never eaten raw. Rather, they’re most often steamed – which is why they’re commonly referred to as steamers – and served with a hot clam broth to dip them in (which helps remove any remaining sand from the clam body) along with melted butter.
There are lots of different varieties of clams – more than 2000 varieties, according to some accounts. They come from all over the world, and they all have unique characteristics, flavors, cooking times, etc. Good fish mongers will be able to tell you the specifics about the varieties they carry and, if needed, which types are most similar to the ones you need for your recipes.
Quantities
The shells constitute the majority of the weight of a clam, and the number of clams you’ll get per pound varies among varieties. If your recipe calls for “two pounds of clams,” make sure to note about how many clams are suggested for the recipe as well. When you see how much “two pounds” of clams is when they’re on the scale at the market, you might want to grab a few more or less depending on your recipe and the number of servings you’re trying to accommodate.
Buy the Best
The most important thing about buying seafood in general is buying it from reputable seafood markets that prioritize sustainability. Freshness is absolutely key when it comes to clams (and mussels, oysters, etc.), but it’s also really important that the mollusks are handled well before arriving in your kitchen.
Fresh clams are typically held in a refrigerated display cooler, usually sitting on top of crushed ice. They’re “displayed” in a single layer which, I’m told, is so they can breathe. If they’re layered too heavily, the clams on the bottom of the pile don’t last long.
Their shells will be damp from the humidity inside the coolers, but they will not be sitting in water and they won’t be packaged in plastic bags. The latter would significantly decrease the life expectancy and quality of the clams.

Come Prepared
The best fish markets will be able to answer questions for you if needed, but be prepared to provide them with at least a few details about what you plan on doing with your clams so they can help you make the right choices.
Bring a cooler or insulated market bag to transport your clams. Typically, fish mongers will put clams into a mesh bag (similar to an onion bag), and then into a plastic bag so you don’t have ice water and clam juice dripping everywhere on your way home. You can also ask for some ice to make sure your clams don’t warm up too much on the way. Keeping the clams at consistently cool temperatures will help avoid shock, and in the worst case, death.
Storing Fresh Clams
This just my personal “thing,” but please remember (for clam’s sake!) that you’re working with living creatures. Try to avoid dropping them or banging them around too much in the sink or when you put them in a bowl.
Ideally you’ll be preparing the clams the day you purchase them, but with careful storage, you can certainly get them a day ahead.
- Remove any plastic bags from around the clams as soon as you get home so they can breathe!
- Grab a glass (non-reactive) bowl large enough to loosely hold all of your clams. Use two bowls if needed to avoid piling several layers of clams (i.e., too much weight) on top of the ones at the bottom of the bowl. This is generally only a concern with more than two pounds of clams.
If you’re going to cook/consume your clams right away:
- Put the clams in a bowl, and keep the bowl in the refrigerator until you’re ready to clean and cook them.
If you plan on storing the clams for several hours or overnight:
- Place a couple of sheets of clean, damp (not dripping wet) paper towels at the bottom of the bowl. Clams will often expel liquid during storage, and the paper towels will help keep that liquid from pooling at the bottom of the bowl and potentially drowning some of your clams.
- Next, put your clams in the bowl and place a damp kitchen towel over the top of your clams. The purpose of this towel is to help maintain some humidity in the bowl, but not cover it too heavily because the clams have to be able to breathe.
- Place the bowl in the coldest part of your refrigerator at temperatures between 33 – 35 degrees F. Prolonged exposure to temperatures above 35 degrees are not recommended.

Preparation – Part A
You’ve probably heard that there are many ways to expel sand and grit from clams before cooking them. I’m only speaking from personal experience with hard shell clams here, but I can proudly say that I’ve now cooked hundreds of them. I’ve never needed to “de-sand” a single one, and I’ve never had an issue. {Knock on wood!}
Before you grab cornmeal, pepper, beer, etc., in hopes of coaxing your clams to cough, sneeze, burp or spit sand out of their shells {all of those terms were garnered from my “research” on this topic – I’m not making them up!}, both Uncle Tom and Hank Shaw would tell you that it probably isn’t necessary because:
“… the vast majority of clams, mussels and oysters you buy in the market have been purged already. You will almost never need to purge your clams if you bought them at a [reputable] market. The exception is if you buy from a small purveyor, and in that case just ask: Have you purged your clams?”
–Hank Shaw, Hunter • Angler • Gardener • Cook
If you’re planning on harvesting your own clams from the wild, then you’ll have some purging to do. Go grab a five gallon bucket or two and read what Hank has to say about the steps needed to get wild clams from the salty seas in which they live to your dining room table in time for dinner (and you’ll never complain about the price of readily available clams at the market again)! 😉
If there’s any question and you feel the need to make sure your clams are indeed sand-free, the Seafood Nutrition Partnership recommends this method:
“Just before cooking, soak your clams for 20 minutes in fresh water. As the clams breathe they filter water. When the fresh water is filtered, the clam pushes salt water and sand out of their shells. After 20 minutes, the clams will have cleaned themselves of much of the salt and sand they have collected. Do not store live shellfish in water for longer than this, otherwise they will begin to die.”

Preparation – Part B
When everything else is prepped and ready to go, pull your clams out of the refrigerator and clean them right before you intend to cook them.
- With cold water running in the sink, quickly scrub the shells with a stiff bristled brush to remove any sediment on the shell surface.
- Discard any clams with cracked or chipped shells, or if there are any clams with open shells that don’t close shortly after you tap them a few times. It’s likely that these clams are dead and they should not be consumed.
- Work in batches if you have more than a couple dozen clams and keep some in the refrigerator while you work on the others. Work quickly because if the clams start to warm up, they may begin to open up and will occasionally make little clicking or creaking noises. It’s not a big deal, but it is a little weird when your food starts “talking” to you. Just work quickly to avoid any potential weirdness altogether.
That’s it – once you’ve scrubbed your clam shells, they’re ready to go and you’re ready to make gorgeous dishes like this Steamed Clams with White Wine, Garlic and Butter !

We’ve always loved seafood, but we enjoy it even more when we prepare it at home. Here’s hoping knowing a little more about clams will inspire you to prepare them at home more often as well!
Just to make sure you’re able to find some soon-to-be favorite seafood recipes, here’s a little collection for you to peruse…
Enjoy!
Steamed Clams with White Wine, Garlic and Butter | BaconFatte.com
Fish & Seafood Favorites from Bacon Fatte
Seafood Nutrition Partnership picks
Fish is the Dish UK’s top fish recipes and tips
Recipe picks from Catalina Offshore Products
Hope this has been helpful! Let us know if you have any other tried-and-true clam tips by commenting here on the blog. We’d love to connect socially, too… Make sure to hashtag #baconfatte or tag @baconfatte on Facebook, Pinterest, Instagram, Twitter, and Google+ when you share our posts and try our recipes!
LIKED THIS? FEAST ON THESE:
 Grilled Halibut with Caper Butter, Tomatoes and Lime
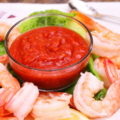 Classic Shrimp Cocktail
 Steamed Clams with White Wine, Garlic and Butter
 Chanterelle Mushrooms with Brandy Butter + How To Prepare and Store Chanterelles
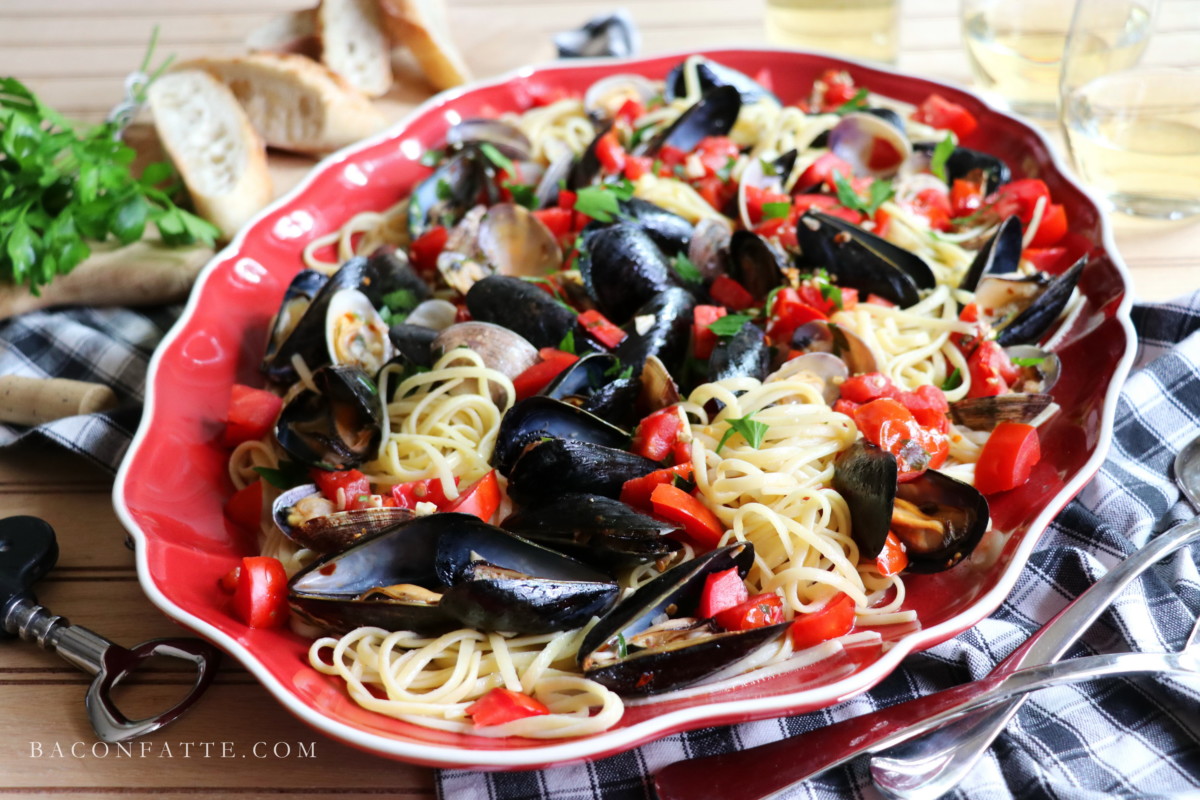 Linguine con le Vongole e Cozze – Linguine with Clams and Mussels
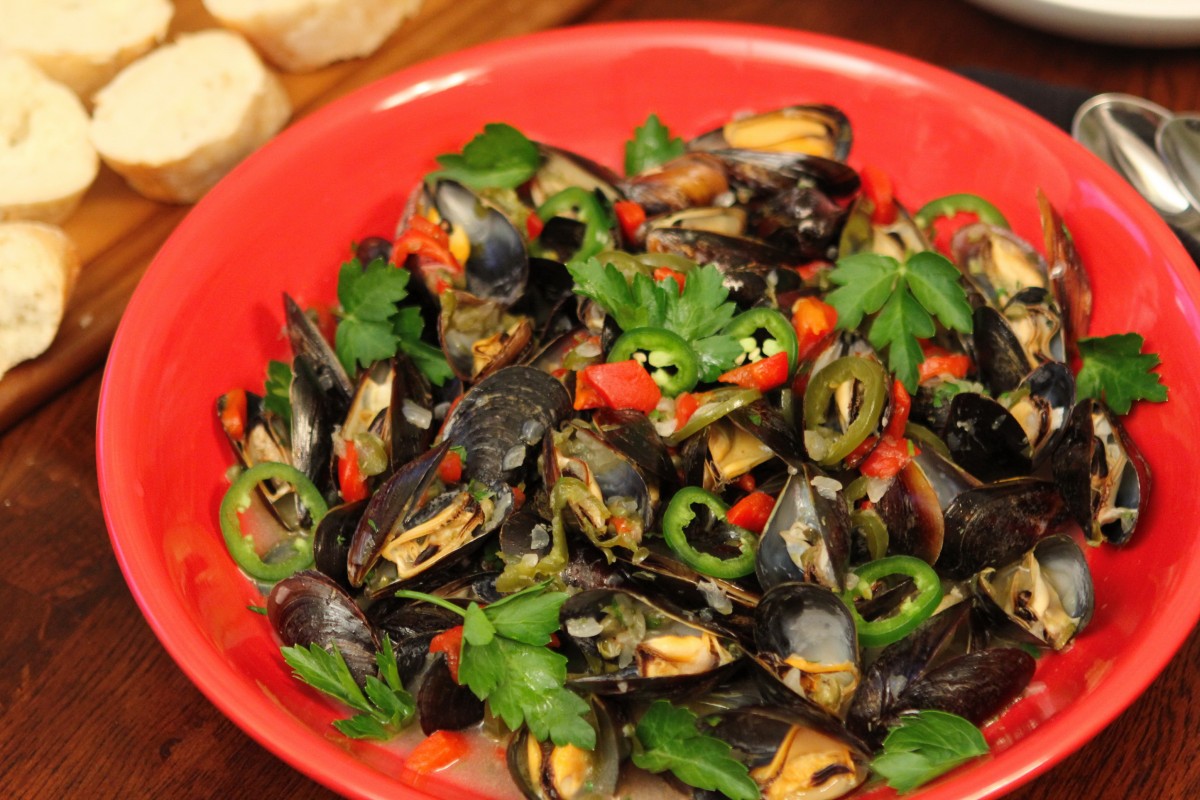 Mussels Holiday (a festive mussels mariniere)
 Smoked Salmon Pasta Salad with Asparagus, Peas and Dill
 Grilled Halibut with Corn Coconut Curry Sauce and Cherry Tomatoes
 Peruvian Shrimp, Corn and Vegetable Chowder
 Spicy Red Chili Shrimp Sauté with Asian Veg and Rice Noodles

[…] really hope you’ll give this recipe a try. I know it can seem a little intimidating at first, but {here} are some tips and tricks that will help you learn how to buy, store and prepare fresh clams. Most […]